How to Use the Xiaomo Assistant (Web)
Xiaomo (小莫) is the lightweight assistant built into Mobius — it floats at the bottom-right of every page. Open it to ask, follow up, spawn clones, attach files, or go hands-free with voice — no need to create a project or task first. This walkthrough covers the whole flow.
1. Open Xiaomo
- Every page has a round "Xiaomo" button at the bottom-right. Click it to open the assistant panel.

2. The Panel Layout
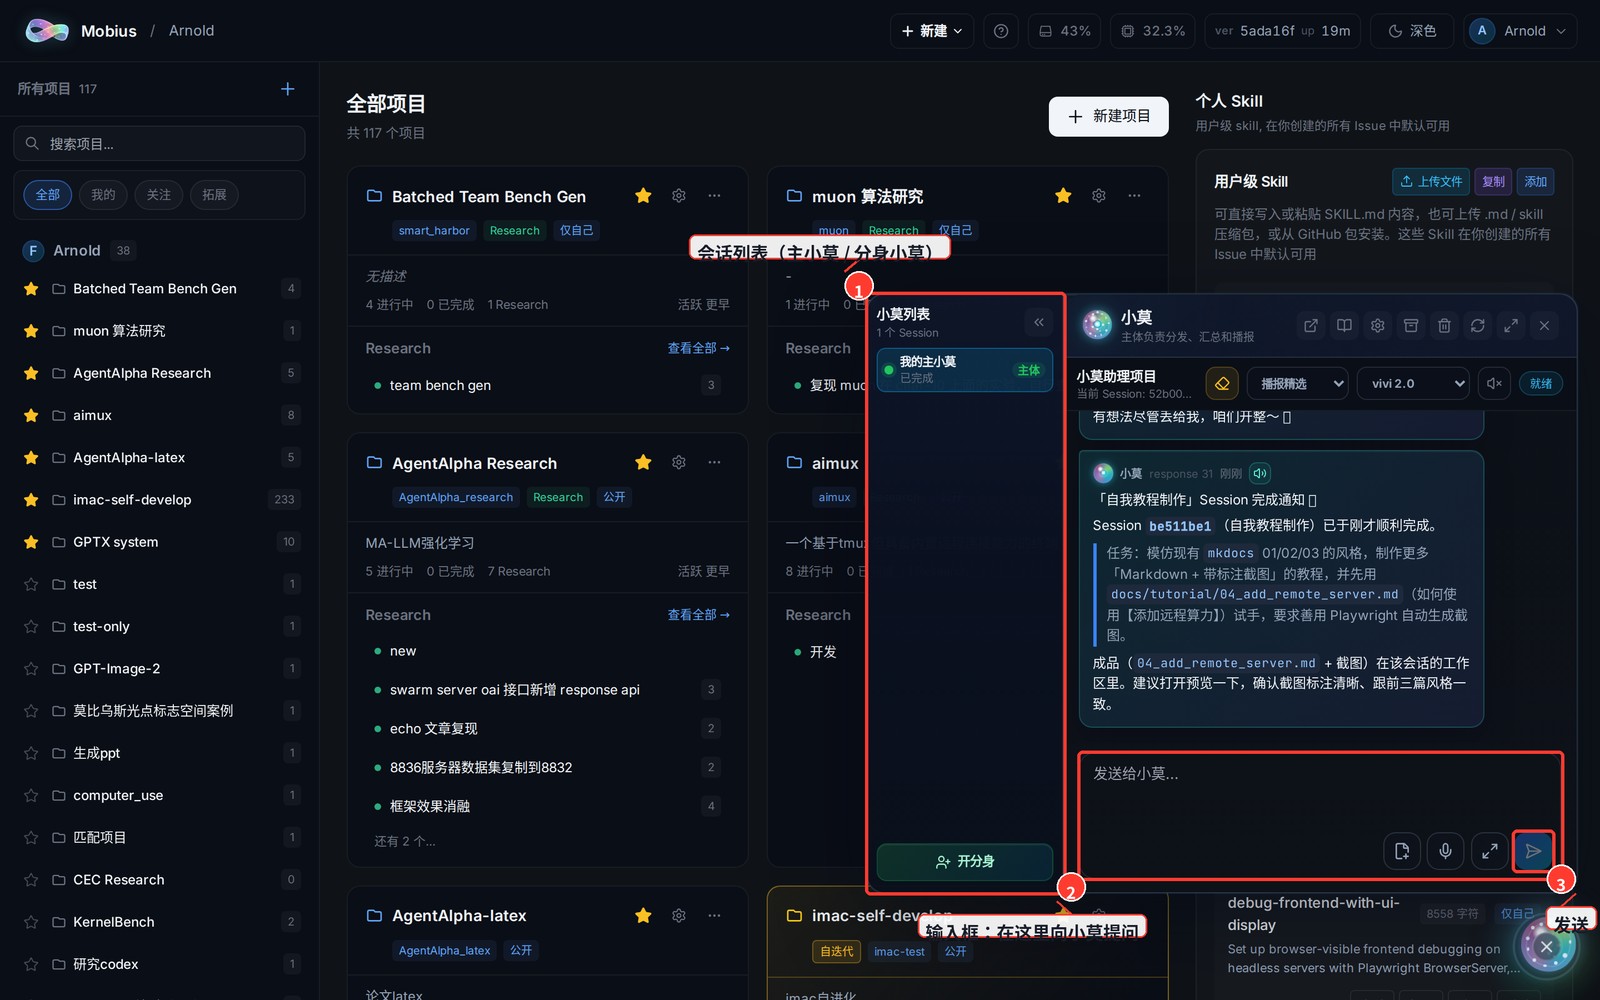
- It opens as a floating layer: the session list on the left (your main Xiaomo + any clones), the conversation in the middle, and the input box at the bottom.
3. Ask, Then Wait for the Reply
- Type your question in the input box and press Enter or click "Send". Your first question auto-creates a "Main Xiaomo" session; later follow-ups reuse it (the context is kept).

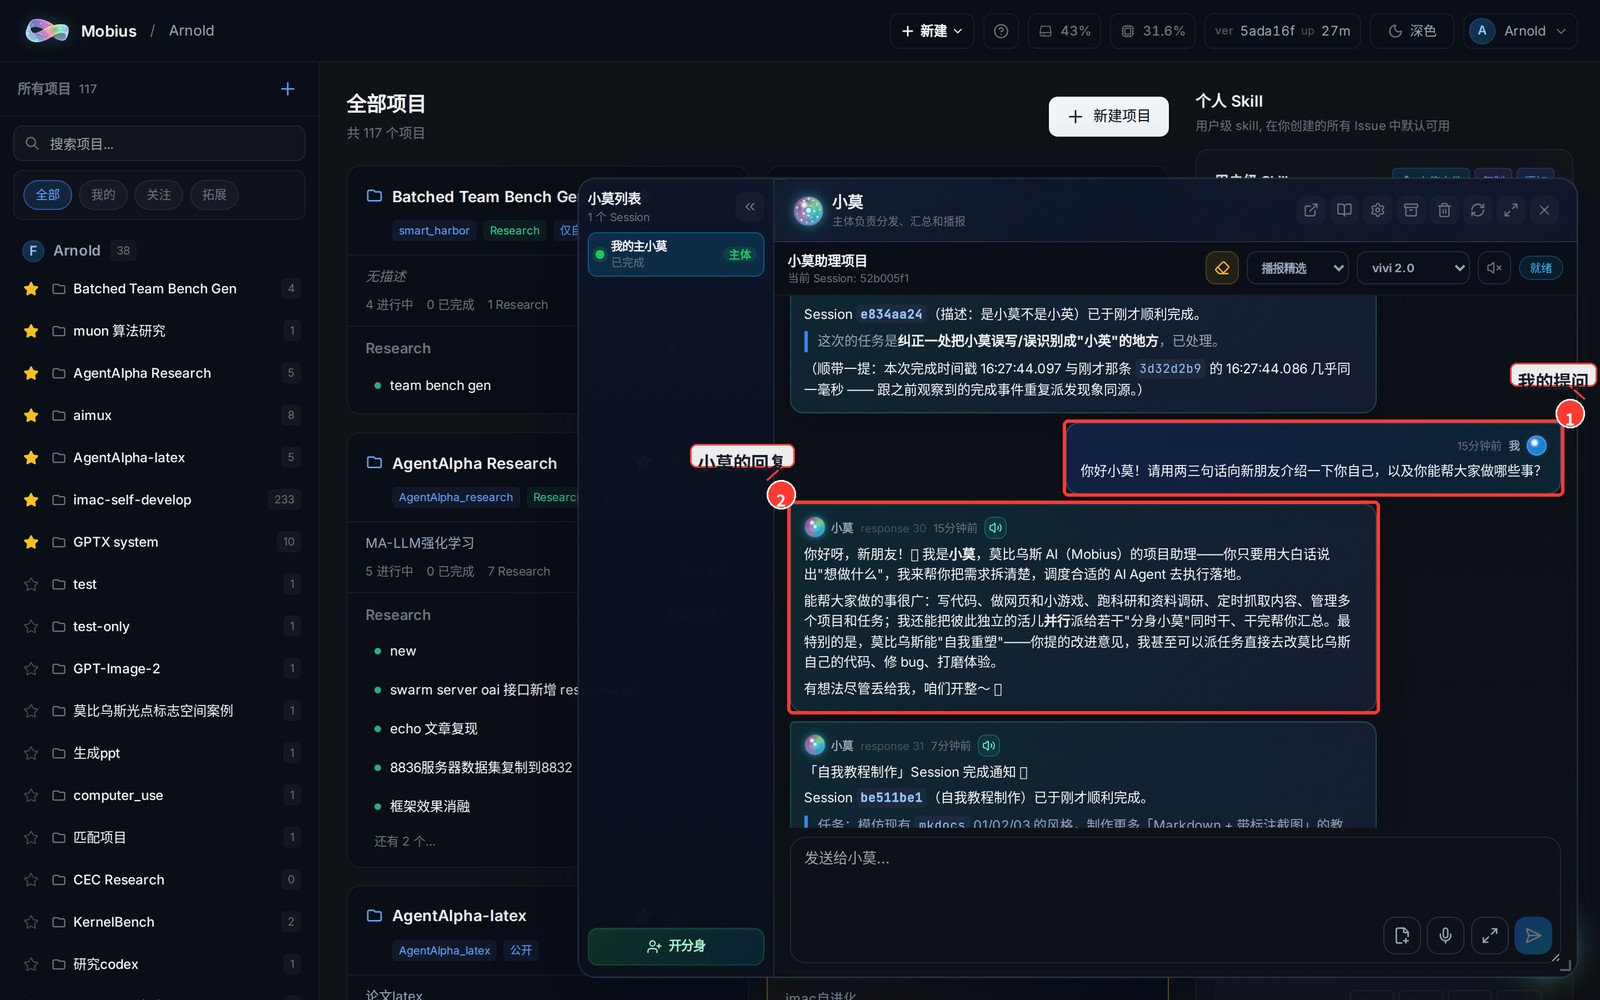
- Replies support Markdown — code blocks, lists and tables are all rendered. For long replies, click "Expand" at the top to switch to a larger / fullscreen view (the screenshot below shows the expanded view).
4. Top Toolbar
- A row of small buttons across the top of the panel. The ones you'll use most:
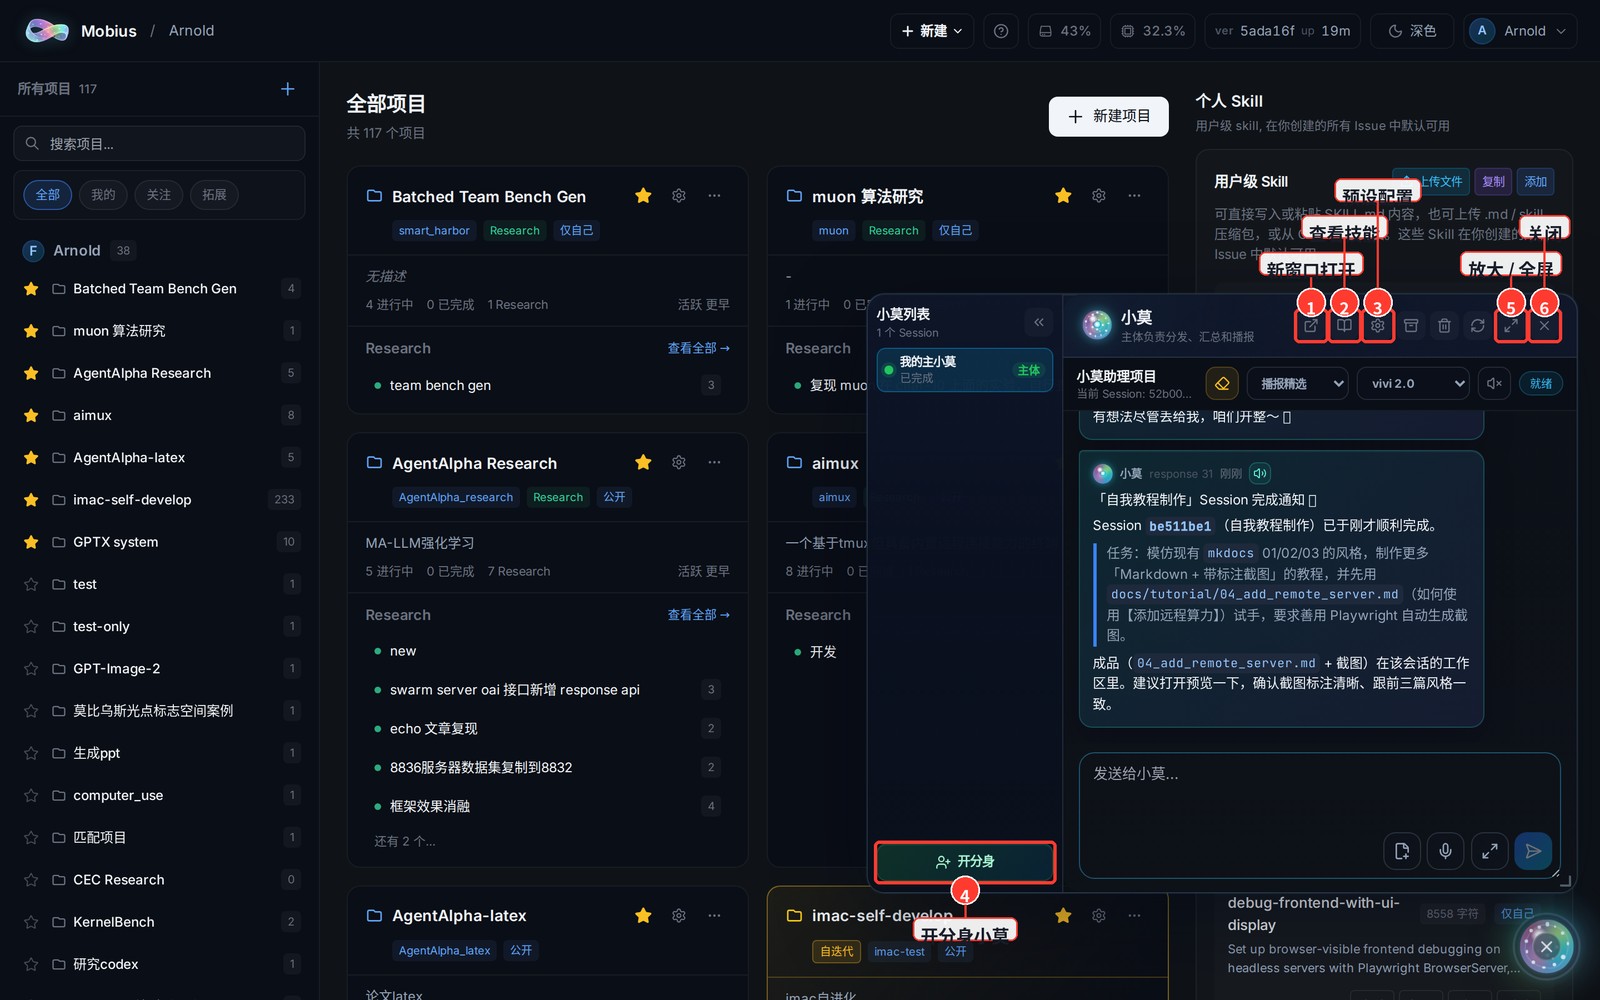
- Open in new window: pop the current session into its own tab so you can keep it open.
- Skills: view / edit the skills (Skills) Xiaomo uses, inside VSCode.
- Preset: predefine a Xiaomo session template to reuse later (see section 7).
- Expand / Fullscreen: compact → expanded → fullscreen, cycling through three sizes.
- Close: collapse the panel (the conversation is preserved).
5. Spawn a "Clone Xiaomo" to Run a Task in Parallel
- Want Xiaomo to do another thing at the same time without interrupting the current chat? Click "Spawn clone", describe the single task this clone should handle, pick a model, and start it.
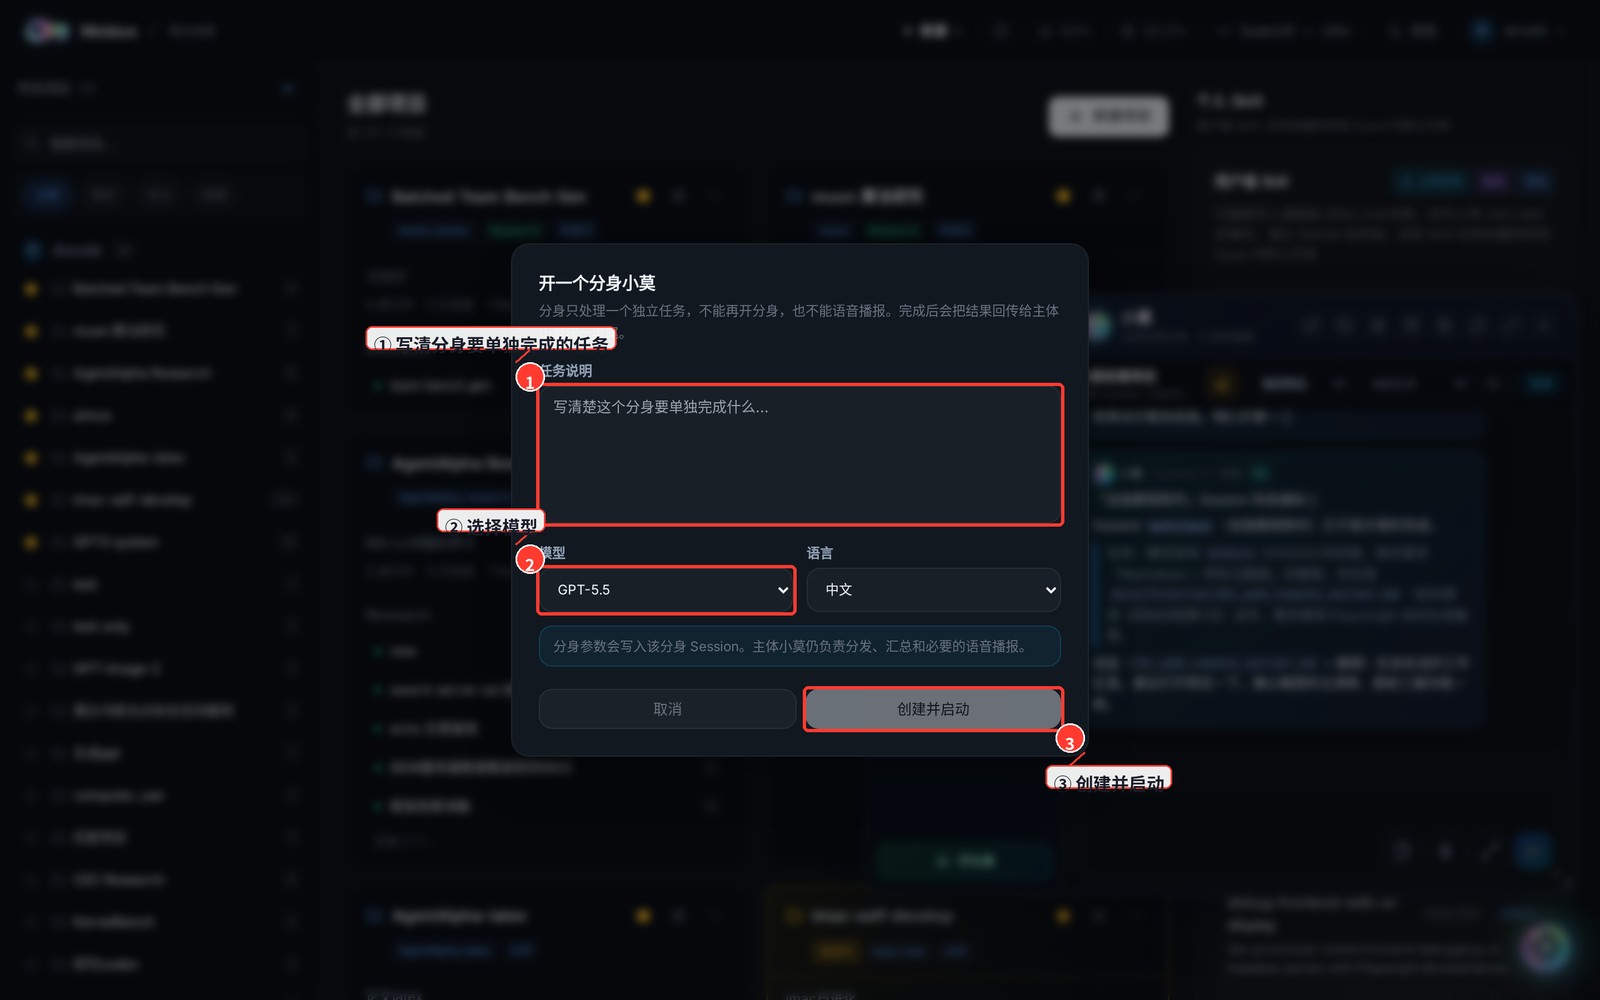
- A clone handles only that one task, then reports the result back to the main Xiaomo. A new "Clone Xiaomo #N" appears in the session list on the left.
6. Voice & Attachments
- A row of small buttons on the right of the input box:
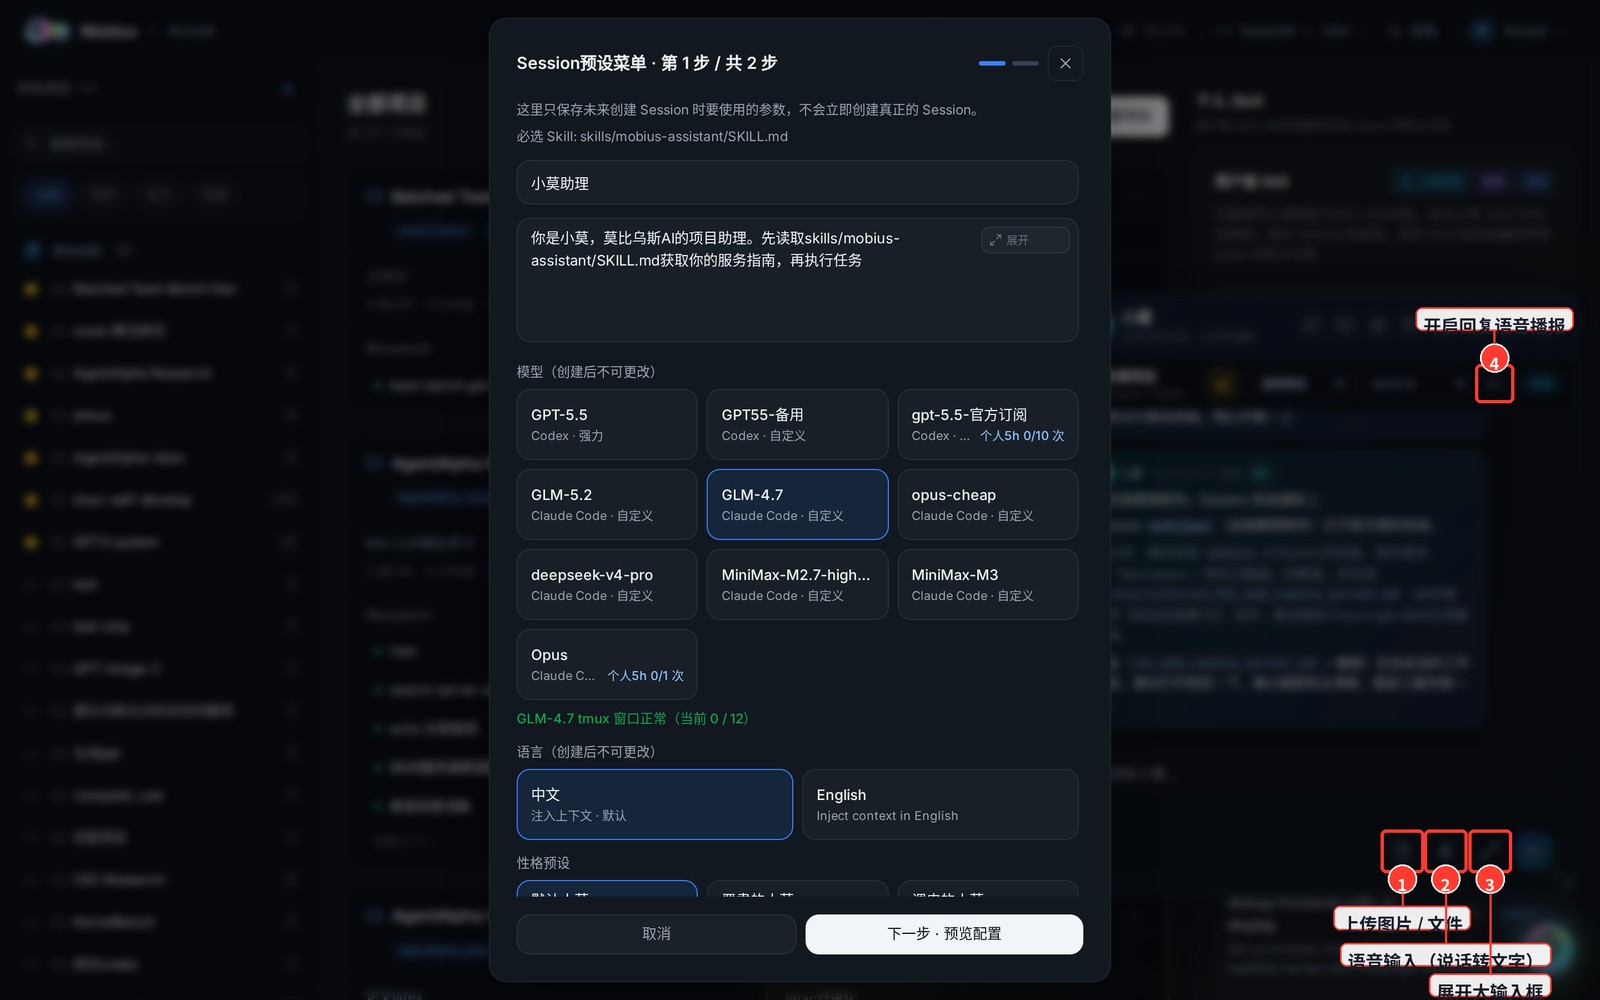
- Upload image / file: click to choose, or paste a screenshot / drag a file straight into the input box.
- Voice input: click once, speak, and your words are transcribed and sent.
- Expand input: enlarge the box for longer messages.
- At the top there's also a "Enable reply voice playback" toggle — turn it on and Xiaomo will read each reply aloud (voice is selectable).
7. Preset (Advanced, Skippable)
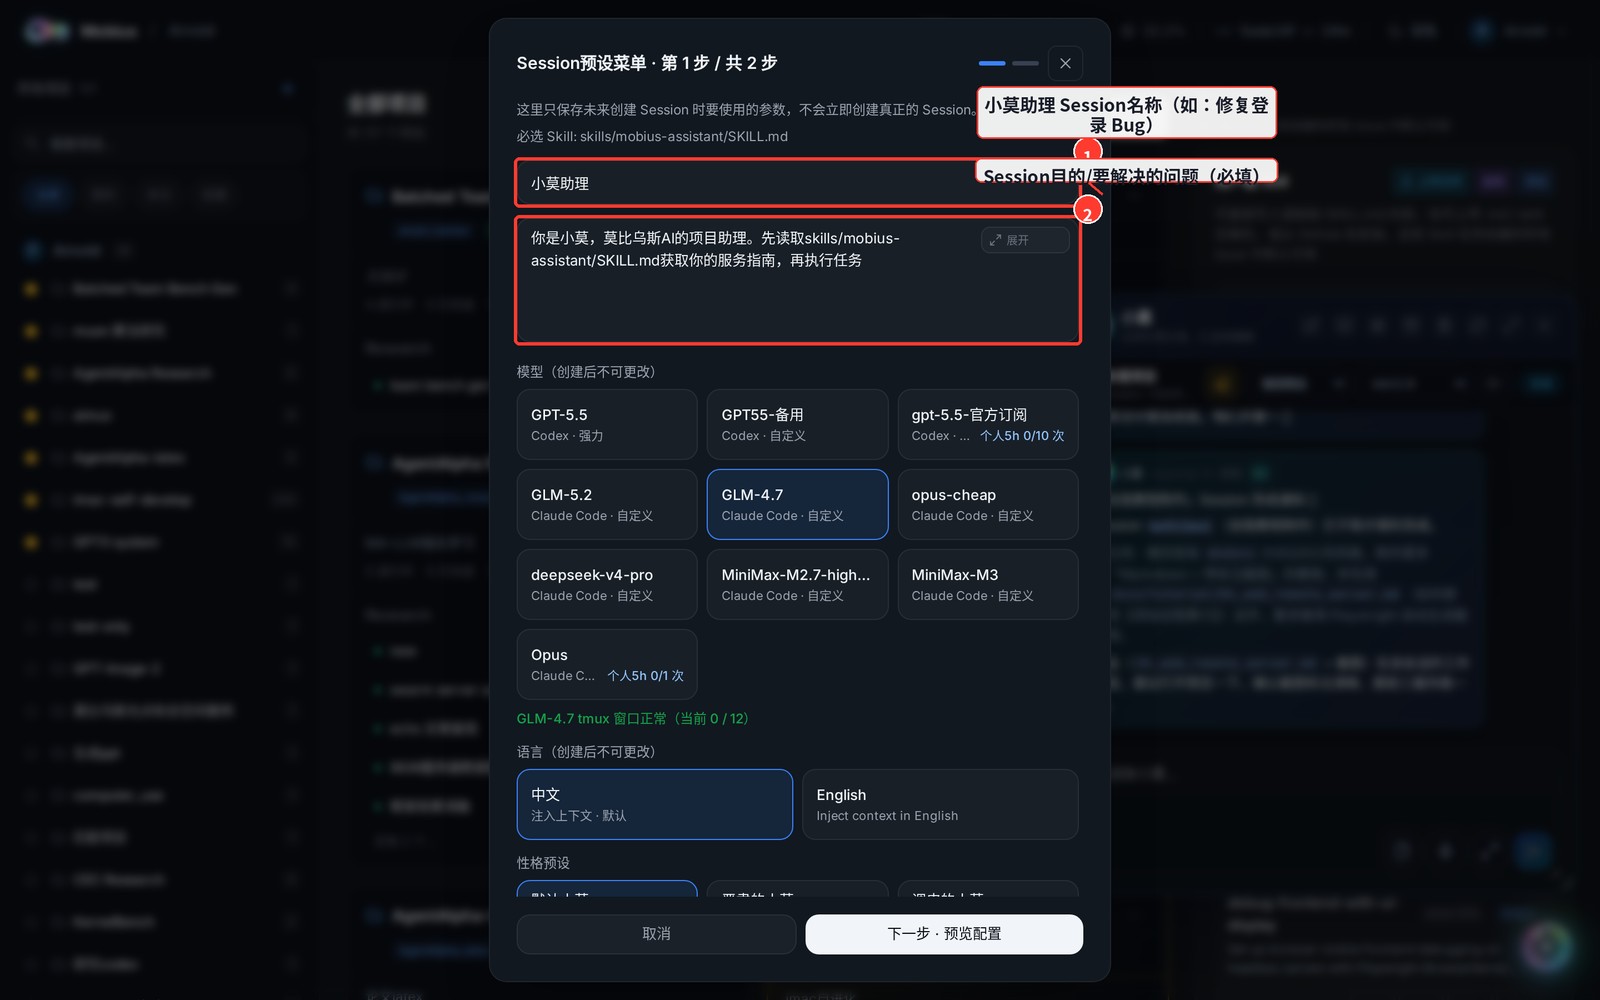
- Click "Preset" to predefine a Xiaomo session template: first fill in the session name and purpose / problem to solve, then pick model and skills in the next step. Save it and reuse it next time instead of re-describing.
In one sentence: Xiaomo is an always-on helper — open it anytime, ask anytime, and spawn a clone when you need to parallelize.